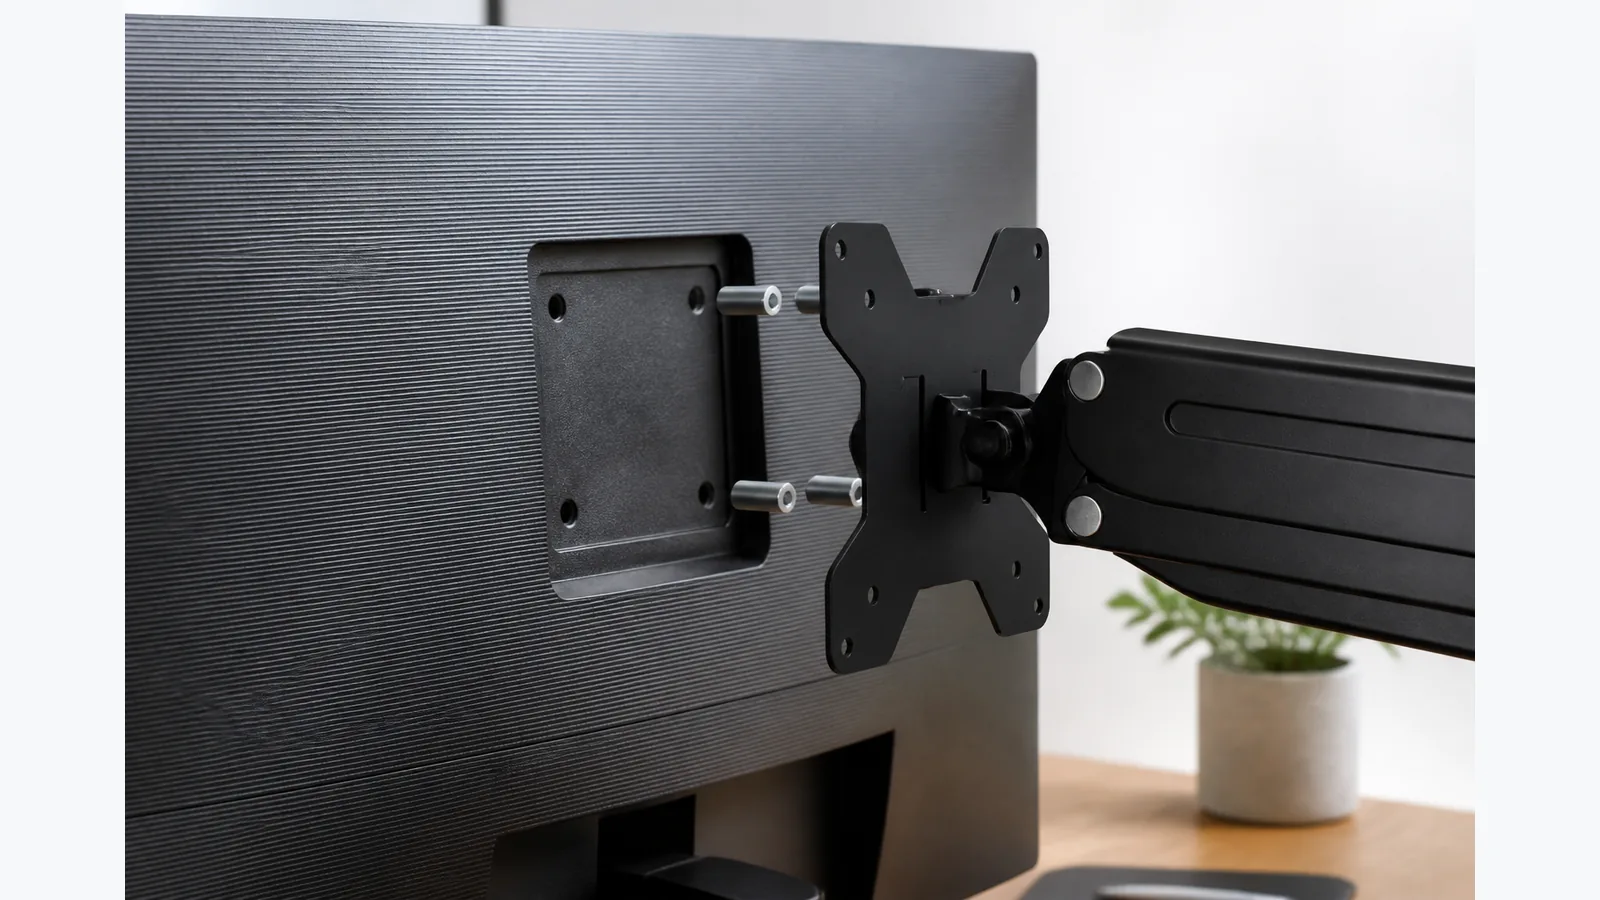
Monitor Arm for Recessed VESA Holes: Plate, Spacer and Screw Checks
If your monitor has recessed VESA holes, a monitor arm can still work, but only when the mounting plate sits flat, the spacers and screws are approved by the monitor or mount maker, and the screws engage cleanly without stressing the housing.
Identify whether the VESA area is flush, raised or recessed
Start by looking at the back of the display. A flush VESA area usually leaves the plate level with the rear surface. A recessed area sits inside a pocket, so the arm plate may bridge the gap before the screws are tightened.
VESA's FDMI overview explains the standard mounting interface between a display and its mounting hardware, which is why matching the pattern comes before any spacer decision.
Check that the arm plate fits the monitor's clear mounting pad
The plate must cover the VESA pattern without fouling ribs, curves or raised plastic around the recess. If the plate rocks or catches on the housing, stop and recheck clearance rather than forcing it.
- Confirm the hole spacing matches the display.
- Make sure the plate has enough flat contact area.
- Leave room for any recess lip or cable cover.
Use only the monitor or mount manufacturer's approved spacers and screw guidance
Dell notes that recessed VESA areas may need spacers when a third-party adapter plate interferes with the monitor housing. A manufacturer installation guide should also tell you whether the monitor's supplied screws can be used.
That is why it is safer to follow the exact guidance in the monitor or mount documentation, including bracket size and any permitted fasteners. For reference, the current SUPTEK M252 details show support for 75 x 75 mm and 100 x 100 mm VESA patterns, but no monitor-specific spacer or screw lengths are published.
Dell's guidance on third-party VESA mounts and Humanscale's desk mount instructions both show why the exact fit and the approved screw set matter.
Confirm thread engagement without bottoming out or stressing the housing
Use screws that thread in smoothly and stop before they bottom out. The aim is firm engagement, not extra force. If the screw length is uncertain, do not guess or add an unapproved stack of washers.
When the fit is unclear, the safest answer is to pause and use the exact hardware guidance supplied for that monitor and mount.
Recheck total load and plate seating before lifting
After tightening, make sure the plate still sits square and the arm can hold position as intended before you lift the monitor off the desk. A quick second check helps catch a plate that settled unevenly in the recess.
- Verify the fasteners remain snug.
- Check that the plate is not twisted.
- Confirm the mount is ready before releasing the display.
Stop and contact support when hardware provenance is unclear
If the screws, spacers or adapter plate came with unclear documentation, do not improvise. Recessed VESA mounts depend on the exact monitor manual and plate clearance, so uncertain hardware is a good reason to stop and contact support.
View the current SUPTEK M252 details if you want to compare the mount with the product page before you buy.